- Getting Started
- Administration Guide
-
User Guide
- An Introduction to Wyn Enterprise
- Document Portal for End Users
- Data Governance and Modeling
- Working with Resources
- Working with Reports
-
Working with Dashboards
- Dashboard Designer
- Selecting a Dataset
- Data Attributes
- Dashboard Scenarios
- Dashboard Templates
- Component Templates
- 3D Scene
- Explorer
- Visualization Wizard
- Data Analysis and Interactivity
- Dashboard Appearance
- Preview Dashboard
- Export Dashboard
- Dashboard Lite Viewer
- Using Dashboard Designer
- Animating Dashboard Components
- Document Binder
- Dashboard Insights
- View and Manage Documents
- Understanding Wyn Analytical Expressions
- Section 508 Compliance
- Subscribe to RSS Feed for Wyn Builds Site
- Developer Guide
3D Scene
The 3D Scene serves as a data visualization tool that can be embedded within a dashboard. This help article provides step-by-step instructions on utilizing a 3D Scene within a dashboard. For guidance on creating or adding a 3D scene in Wyn Enterprise, refer to the Create 3D Scene help article.
Navigate to the dashboard designer and follow the below instructions,
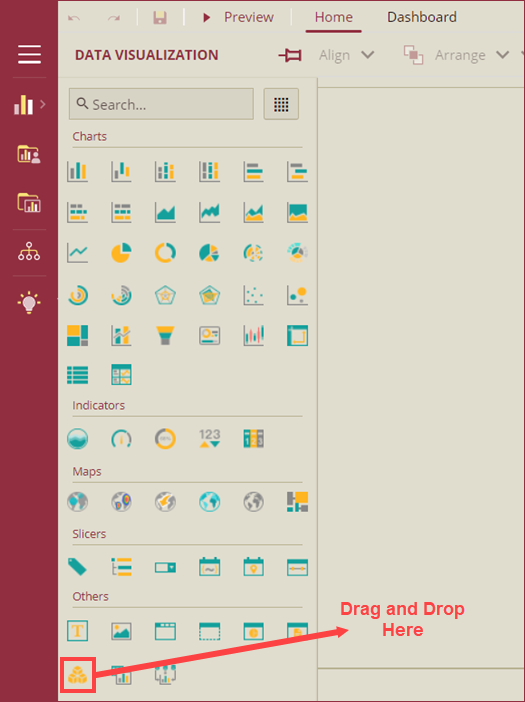
From the Data Visualization tab, drag and drop the 3D Scene component onto the designer area.
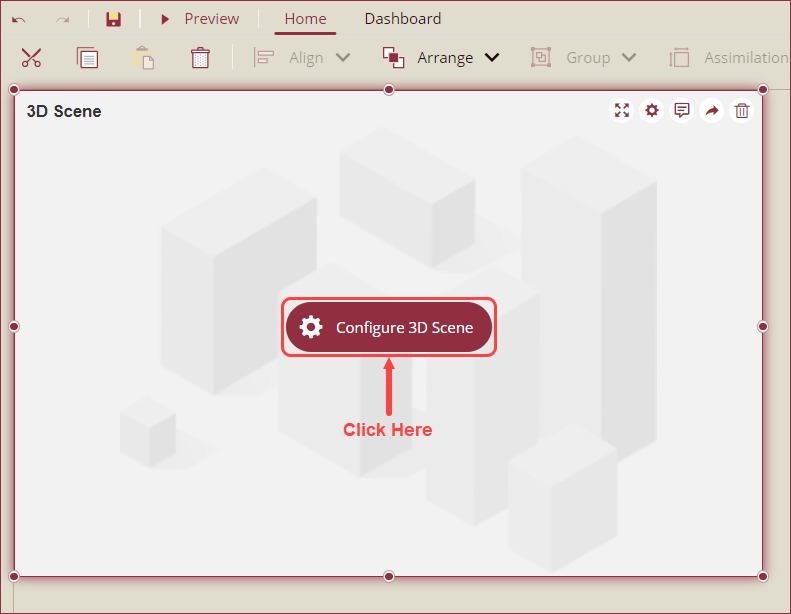
Click the Configure 3D Scene button on the 3D Scene component.
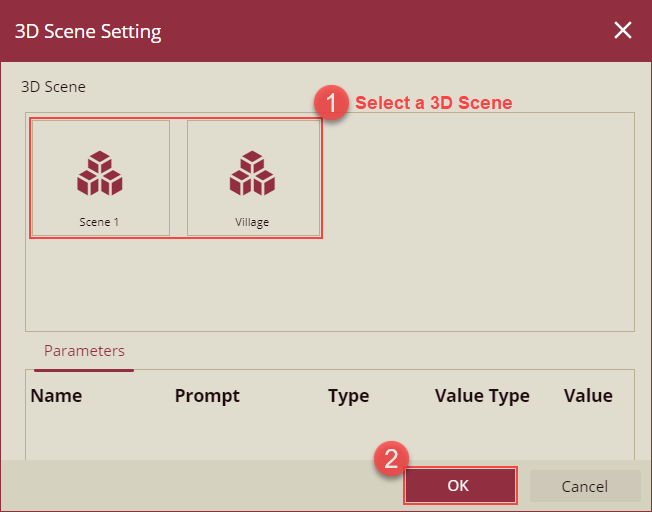
3D Scene Setting popup will appear on your screen. Select a 3D scene, set the parameter values, and click the OK button.
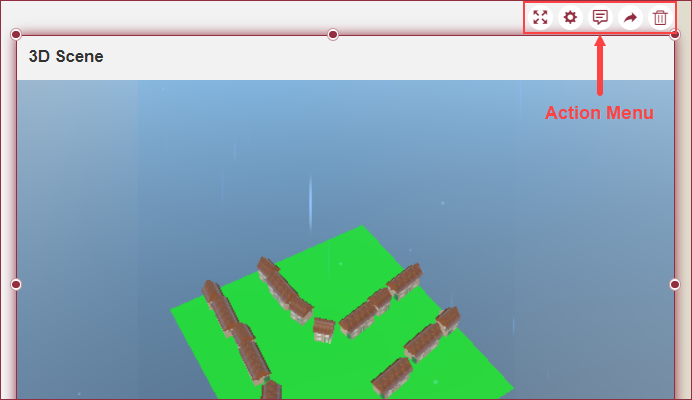
The configured 3D scene will appear in the 3D scene component on the dashboard designer. You can now modify the scene settings using the Inspector Panel. The Inspector Panel Properties are listed and explained in the below section.
You can use the action menu bar to zoom, configure, add annotations, share, and remove the 3D scene.
Inspector Panel Properties
Animation
Property | Description |
|---|---|
Entrance Animation | Select an option from the dropdown to set the animation style of the appearance of the 3D scene on the dashboard. The available options are - SlideInDown, SlideInLeft, SlideInRight, SlideInUp, SlideInDown, BackInDown, BackInLeft, and BackInRight. After selecting an option from the dropdown, set the delay and duration of the animation using the Delay(s) and Duration(s) properties respectively. |
Interaction
Property | Description |
|---|---|
Scenario Name | Add a name to the 3D scene scenario using this property. |
Cross Filter | To disable the filtered data throughout the dashboard, set this property to False. Cross filters provide a simplified and deeper analysis of what you want to observe. By default, this property is set to True. |
Jump To | To create a shortcut to another dashboard scenario, report, or URL use the Jump To property. In the Jump To popup, you can configure the data layers used for one specific layer or all layers. See the Jump To help article for more information. |
Visible Menu Items | Select the filtering and sorting options you wish to display on the 3D scene scenario from the dropdown. |
Pin Annotations | To pin the annotation to the 3D scene scenario, set this property to True. By default, this property is set as False. |
Context Menu Options | Select the Context Menu Option(s) from the dropdown. Context Menu Options include - All and Jump. |
Click Action | Select either None or Jump option from the dropdown to perform an action on click. |
Title
Property | Description |
|---|---|
Show Title | To hide the title of the 3D scene scenario set this property to False. By default, this property is set to True. |
Title | Add or edit the title of the 3D scene scenario using the Title property. |
Alignment | Select the Left, Center, or Right alignment option of the title from the dropdown. |
Title Font Setting | Set the font family, size, color, weight, and style of the title using the Title Font Setting options. |
Padding | To create space around the title use the Padding property. You can set the following padding options: Padding Left, Padding Top, Padding Right, and Padding Bottom. |
Layout
Property | Description |
|---|---|
X Position | Set the horizontal position of the 3D scene scenario on the dashboard using the X Position property. |
Y Position | Set the vertical position of the 3D scene scenario on the dashboard using the Y Position property. |
Width | Set the width of the 3D scene scenario using the Width property. You can set the minimum width up to 8. |
Height | Set the height of the 3D scene scenario using the Height property. You can set the minimum height up to 8. |
Appearance
Property | Description |
|---|---|
Style Template | Select a style template from the dropdown to apply a style to the 3D scene scenario. |
Background Color | Set a background color of the 3D scene scenario using this property. |
Padding | To create space around the 3D scene scenario, set a padding value. |
Margin | Set the margin value for the 3D scene scenario using this property. |
Visibility | To hide the 3D scene from the dashboard, set this property to False. By default, the Visibility property is set as True. |
Background Image | Add an embedded, shared, or external image as a background image to the 3D scene scenario. |
Border | Set the border type, border color, and thickness using this property. |
Shadow | Create a shadow of the 3D scene scenario by setting the Shadow Type, Shadow Color, and Thickness properties. |